Deploying iTunes from an external hard drive,
rather than your computer’s internal hard drive has it’s fair share of
pros and cons. It’s usually done for space and storage purposes, but
there may be some other reasons to migrate your iTunes library to an
external hard drive also.
I recently made the jump from a standard hard drive to a solid state drive for my notebook computer, but because SSDs are still quite expensive per gigabyte, I purchased a less expensive, lower capacity SSD. The SSD works great, but there is simply not nearly enough storage capacity to hold the media files such as music, videos, and TV shows that are in my iTunes library. Thus, they needed to be stored on an external drive.
There is one major disadvantage of this approach, which is simply that you of course must have your external hard drive with you, if you want to play songs, watch movies, or watch TV shows in your iTunes library.
Even so, I actually found that storing iTunes on an external had some pros also. Most people tend to use desktop, outlet powered 3.5” external hard drives to store their media, but I chose a portable, 2.5” USB powered drive for the following reasons:

Copy the iTunes Library
If your iTunes Library is already on your external hard drive, you can skip this step and proceed to Setup iTunes.
With your external hard drive connected to your computer, the first step is to copy the iTunes library from your computer to the external.
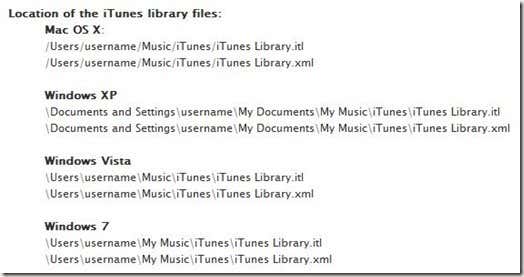
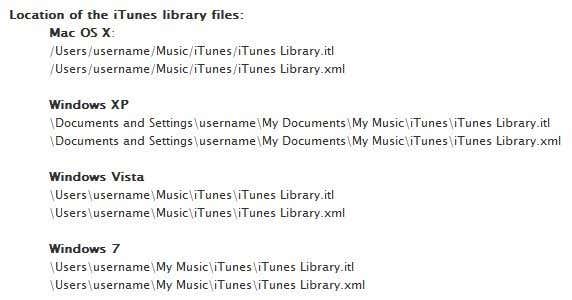
In Mac OS X, the path to an iTunes Library is:
Finder > Music > iTunes
In Windows, the path to an iTunes Library is:
Start > Computer > Music > iTunes
Once you have found the top level folder, simply labeled as iTunes, copy it to your external hard drive by dragging the entire folder to the drive. The copying process, of course, may take a considerable amount of time depending on how many files you have in your iTunes Library.
Setup iTunes
Once the copy process has finished, now it’s simply a matter of pointing iTunes towards the new library.
On a Mac:
Launch iTunes and navigate iTunes > Preferences. Select the Advanced tab and click the Change… button. Set the new iTunes path.
On a PC:
Launch iTunes and navigate Edit > Preferences. Select the Advanced tab and click the Change… button. Set the new iTunes path.
Note: The path that you set should be to your iTunes Media folder, which is located inside of the top level iTunes folder.
Assure that the options Keep iTunes Media folder organized and Copy files to iTunes Media folder when adding to library are checked. Click the OK button.
Set Consolidate Files Option
On a Mac:
File > Library > Organize Library…
On a PC:
File > Library Organize Library
Check consolidate files and click the OK button to proceed.
Finishing Up
At this point, you have your iTunes library on the external hard drive, and iTunes is now setup to run media from the external. However, there may be no files showing up in iTunes.
On a Mac:
File > Add to Library…
On a PC:
File > Add File to Library…
Locate your iTunes XML file which is usually labeled as iTunes Library.xml and add it to the library. It is located in the top level iTunes folder in one of the sub folders.
Once added, iTunes should immediately begin to process the file. Once it finishes, your iTunes Library should be populated with your media from the external!
No XML File
If you cannot find the XML file, or if you don’t have an XML file, you can use a different method. Locate the iTunes folder on your external hard drive. From there, locate the iTunes Media folder and open it. Inside, there will be different folders representing the various media types that iTunes handles, such as Music, TV shows, Movies, etc…
Drag each of these folders from the external hard drive into the main portion of the iTunes window on your computer. This should populate iTunes and update the library, but not add the files to your library again. Or in simpler terms, do the same thing as the XML file.
That’s pretty much all there is to it. In using the above tutorial, you should now be running iTunes directly from your computer’s hard drive, but storing the media on an external. If anyone has any questions regarding setting up iTunes on an external drive, you can leave a comment and I will try to help out. Thank you for stopping by the site for today’s post.

I recently made the jump from a standard hard drive to a solid state drive for my notebook computer, but because SSDs are still quite expensive per gigabyte, I purchased a less expensive, lower capacity SSD. The SSD works great, but there is simply not nearly enough storage capacity to hold the media files such as music, videos, and TV shows that are in my iTunes library. Thus, they needed to be stored on an external drive.
There is one major disadvantage of this approach, which is simply that you of course must have your external hard drive with you, if you want to play songs, watch movies, or watch TV shows in your iTunes library.
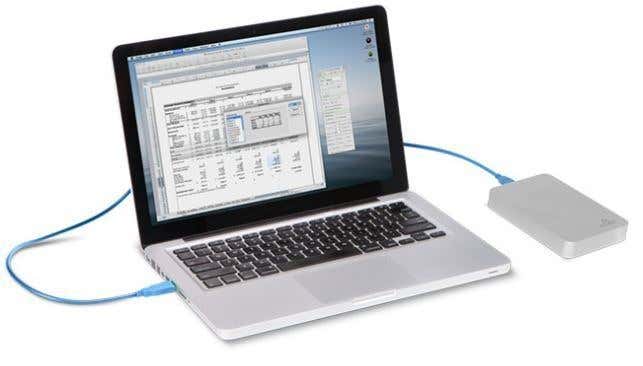
Even so, I actually found that storing iTunes on an external had some pros also. Most people tend to use desktop, outlet powered 3.5” external hard drives to store their media, but I chose a portable, 2.5” USB powered drive for the following reasons:

- Being USB powered and more portable, I can take my iTunes library with me while on the go, should I decide to bring my notebook computer also.
- The drive is portable, so I can also easily take it out to the living room and use it with the USB port on the TV, Xbox, Roku, Apple TV, or similar devices.
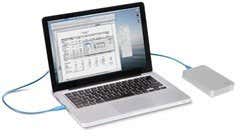
- With iTunes on an external instead of internal inside of the notebook, it can be easily connected to the back of a router, should I ever want to set it up as an iTunes server.
Copy the iTunes Library
If your iTunes Library is already on your external hard drive, you can skip this step and proceed to Setup iTunes.
With your external hard drive connected to your computer, the first step is to copy the iTunes library from your computer to the external.
In Mac OS X, the path to an iTunes Library is:
Finder > Music > iTunes
In Windows, the path to an iTunes Library is:
Start > Computer > Music > iTunes
Once you have found the top level folder, simply labeled as iTunes, copy it to your external hard drive by dragging the entire folder to the drive. The copying process, of course, may take a considerable amount of time depending on how many files you have in your iTunes Library.
Setup iTunes
Once the copy process has finished, now it’s simply a matter of pointing iTunes towards the new library.
On a Mac:
Launch iTunes and navigate iTunes > Preferences. Select the Advanced tab and click the Change… button. Set the new iTunes path.
On a PC:
Launch iTunes and navigate Edit > Preferences. Select the Advanced tab and click the Change… button. Set the new iTunes path.
Note: The path that you set should be to your iTunes Media folder, which is located inside of the top level iTunes folder.
Assure that the options Keep iTunes Media folder organized and Copy files to iTunes Media folder when adding to library are checked. Click the OK button.
Set Consolidate Files Option
On a Mac:
File > Library > Organize Library…
On a PC:
File > Library Organize Library
Check consolidate files and click the OK button to proceed.
Finishing Up
At this point, you have your iTunes library on the external hard drive, and iTunes is now setup to run media from the external. However, there may be no files showing up in iTunes.
On a Mac:
File > Add to Library…
On a PC:
File > Add File to Library…
Locate your iTunes XML file which is usually labeled as iTunes Library.xml and add it to the library. It is located in the top level iTunes folder in one of the sub folders.
Once added, iTunes should immediately begin to process the file. Once it finishes, your iTunes Library should be populated with your media from the external!
No XML File
If you cannot find the XML file, or if you don’t have an XML file, you can use a different method. Locate the iTunes folder on your external hard drive. From there, locate the iTunes Media folder and open it. Inside, there will be different folders representing the various media types that iTunes handles, such as Music, TV shows, Movies, etc…
Drag each of these folders from the external hard drive into the main portion of the iTunes window on your computer. This should populate iTunes and update the library, but not add the files to your library again. Or in simpler terms, do the same thing as the XML file.
That’s pretty much all there is to it. In using the above tutorial, you should now be running iTunes directly from your computer’s hard drive, but storing the media on an external. If anyone has any questions regarding setting up iTunes on an external drive, you can leave a comment and I will try to help out. Thank you for stopping by the site for today’s post.
Really your blog is very interesting.... it contains great and unique information. I enjoyed to visiting your blog. It's just amazing.... Thanks very much softwaretopreviewer
ReplyDelete