How did I create this blog…?
I put the success down to focusing on great content over anything else.Shortly, I will begin teaching you how to create a website. You could use it for virtually anything; a personal blog, online portfolio, online store, sales page, you could even make it almost identically to this site.
But before I do this, I wanted to tell you a few reasons why I’m qualified to teach you:
- Before and since creating techy-tips, I have created websites and blogs that reached over 100,000 visitors a month. I haven’t got ‘lucky’, I have a system that works.
- My blogs get featured by the biggest websites, including: Reddit Homepage, BusinessInsider, Yahoo Finance, The New York Times and it has even been a trending topic on Twitter. (how many bloggers can boast that?!?!)
- Thousands of people have paid for my courses on Internet Marketing.
- In 2010 I created a popup email box on IncomeDiary, I then developed it into a WordPress plugin and sold over 20,000 copies of it. (the majority of which were at $37 – $77)
Welcome to the Masters guide to creating a succesful blog, just like this one.
Time to complete this step-by-step guide: 60 minutes
Total cost: Under $100.
The benefits of creating a blog:
- You are able to add/edit/delete content through a control panel.
- The website will look & functions in the way that you would want it.
- Readers and customers will be able to contact you via a contact form.
- You will be able to add/edit/delete adverts with a mouse click.
- Schedule and publish new content on your homepage.

To see this website LIVE, visit TrustedWeddingPlanner.com
This is a typically look I go for when I create every new blog, including Incomediary. I keep it simple, I make it useable. Then once the site proves itself, I invest more money and time into it. This way, I risk little up front but using a few great resources, still manage to build a professional looking site.
How To Quickly Create Your Own Website
1. Getting Your Website Online
I need three things to run this website:- A Domain, this is what you call your website, for me it’s IncomeDiary.com, for you it could be MyBlogName.com
- Web Hosting, this is required to host your website on the internet so that people can visit it.
- WordPress, this is what will help you run your website, this free software will allow you to add, edit and delete pages on your website. You also have a choice from over 100,000 different blog designs and 1000′s of free plugins that will allow your website to do different things.
1. Registering a Domain
Before you do anything, you must decide on a name for your website and purchase your .Com (or .co.uk. .org .net etc). I have a lot of domains, how I come up with the domains is simple. They are descriptive of what the site is about, so for example, ExpertPhotography.com is about how to become an expert at photography.When my friend approached me to help him come up with a domain for an outsourcing site, I asked him, whats the goals of your blog? He told me it was to save entrepreneurs time by outsourcing. I recommended he named his site SaveTimeOutsource.com and that is what he went with. Personally, I would only go for a .Com (it’s the most popular & easiest to remember) and I would also keep the name as short as possible.
To register your domain, go to a website called GoDaddy, if you live in the US you will probably have seen their Superbowl adverts and already know who they are. A domain will set you back less then $10 a year and is one of the most important things to get right.
2. Here’s How to Host Your Website on the Internet
Your on my website right now, to do this, I have to host it on a server so that people can come and visit it. It’s quite simple, you rent some space on a server for around $5 a month and can put all your files on it and thousands of people can come and visit it without any hassle.I personally use HostGator and I highly recommend them because they have 24/7 live support with agents who will always be happy to help you with any issue you may have.
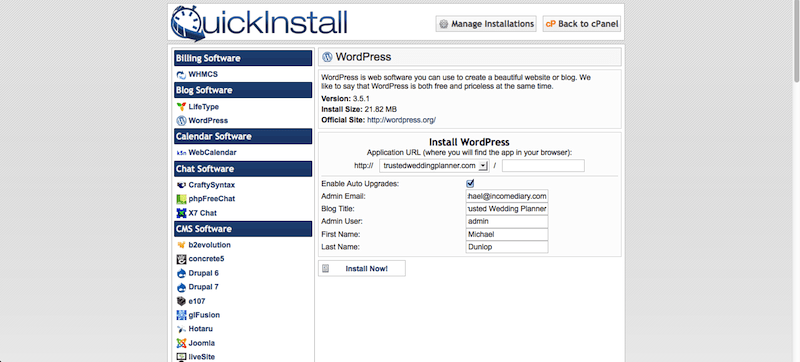
One of the main reasons why I recommend hosting with HostGator, is because they have a program in their user control panel called QuickInstall which allows you to install WordPress (blogging software) with one click.
They don’t charge any additional price for this but if you went with any other company, you would be likely to pay an extra $10 or so a month which is more then the hosting in the first place. When ordering your hosting, use coupon code: incomediary25 to get 25% off your order.
3. Connecting your Domain & Hosting Together
Now that you have a domain and web hosting, you have to let them know you want to use the two together. You do this with nameservers.When you purchase your hosting from HostGator, they will email you two nameservers. You then login to GoDaddy, edit your domain settings and type in your nameserver address. Then they will be connected.

4. Installing WordPress onto your Hosting
Back in the day when I started, this would be a nightmare, you would have to upload thousands of files and learn lot’s of technical stuff which no one wants to do.However, now all you need to do is login to your hosting controle panel and click QuickInstall >> Install WordPress, less then 60 seconds later your blog is installed, you have a website on the internet and you can start publishing content.
Here is a video I recorded taking you through the whole thing in under 10 minutes.
Click Here To Visit GoDaddy.com
Click Here To Visit HostGator.com (use coupon code: incomediary25 to get 25% off your order)
Click Here To Visit HostGator.com (use coupon code: incomediary25 to get 25% off your order)
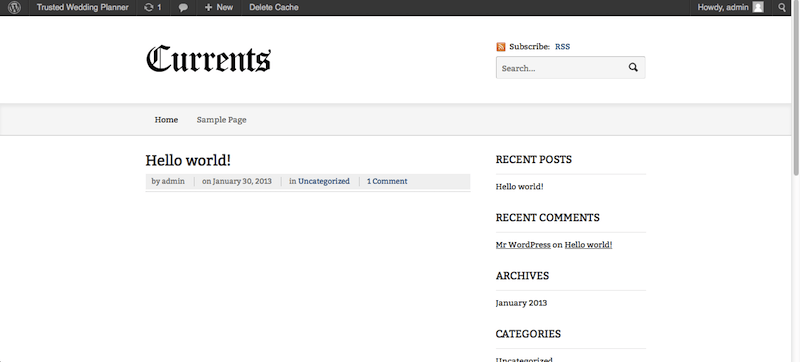
2. Customizing Your Website / Blog Design
At this point, your website should look something similar to this. (The designs can very depending on which free design WordPress are offering pre-installed at the time.)
1. Finding a Design for your Website
By using WordPress, you are now able to use over 100,000 already created blog design themes. Some free and some much better that come at a small cost.All the blogs that I have started since creating IncomeDiary, have used blog themes from Woothemes, which says a lot about the quality of their designs.
Go to Woothemes.com and and look through all the themes. They have themes that can be used as a portfolio, business website, magazine, and of course a blog.
Once you chose and purchased your blog theme, you need to log into your WordPress admin area. Then click Appearance on the left side, then click Themes. Click upload, find your theme and once installed, active it.
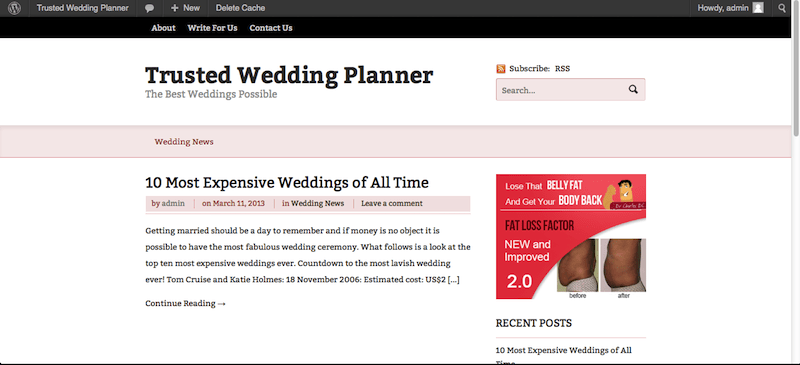
For my Wedding blog, I used Currents theme. This is what it now looks like:
2. How To Customize Your Blog Design
With every Wootheme, you get a custom dashboard to edit the look and feel of the theme. On the left hand side of your WordPress admin area, click the blue button with the name of your theme on it. In here you can edit almost everything, it’s all very self explanatory, go through it and make the changes you want.Next, click on Appearance >> Widgets on the sidebar.
Here you can play around, adding, editing and removing widgets on your blog.
A widget is like a gadget or an attachment. Something not required for the site to function but can be used to improve it in some way.
Here’s how my blog looks now:
Thanks for the post there is a tutorial to how create a website using a free host https://www.youtube.com/watch?v=lw9mzDDusNw&t=2s
ReplyDelete